How to back up your iPhone with iTunes or Finder
How to back up
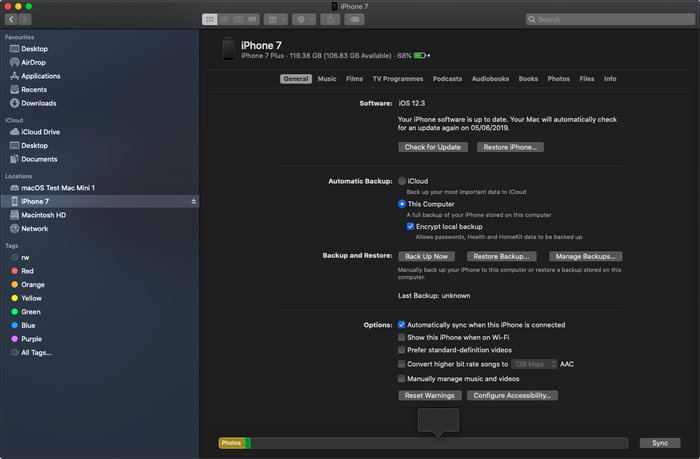
You’ll need to use a computer to back up your iPhone to iTunes or Finder, but you can use as much storage space as you have free on your computer.
Back Up Now
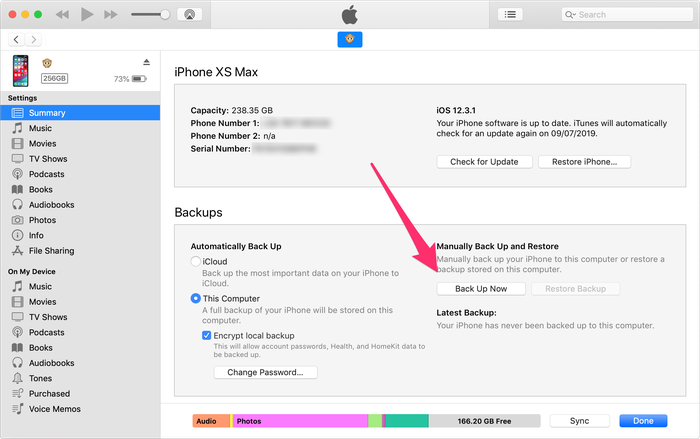
Here’s how to get backups working with iTunes or Finder in three steps:
Step 1 Click the Back Up Now button in iTunes or Finder. Wait until the backup is finished, and don’t disconnect the USB cable until then.
Step 2 Ensure This PC or This Computer is the backup location, not iCloud.
- If you want to encrypt your data, select the checkbox of Encrypt local backup and choose a password for the backup. We recommend doing this, as it provides better protection for your information. Without setting a password, anyone who has access to your computer can access any information stored in your iPhone backup.
- As an added bonus, if your backups are encrypted, Apple will include even more data in them than they otherwise would: such as Health information and the saved passwords in your Keychain.
Step 3 Click the Back Up Now button in iTunes or Finder. Wait until the backup is finished, and don’t disconnect the USB cable until then.
How to enable wireless iPhone backups
Step 1 Connect your iPhone or iPad to the computer with a USB and open the iPhone section on iTunes or Finder.
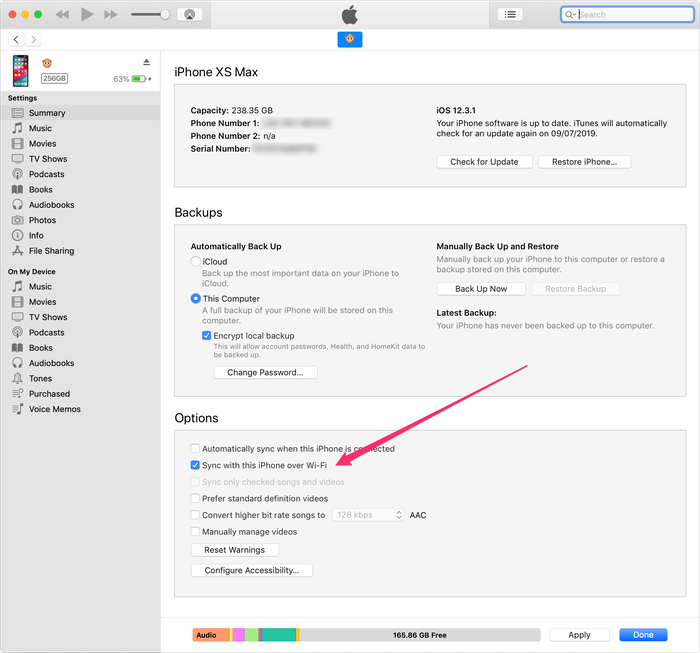
Step 2 Tick Sync with this iPhone over Wi-Fi, then hit Done at the bottom of the window.
Step 3 Disconnect the USB cable from the iPhone. At the same time, ensure your iPhone is on the same Wi-Fi network as the computer. If so, the iPhone pane should still be available in iTunes or Finder.
Step 4 Click the Back Up Now button in iTunes or Finder, and a backup should be taken over Wi-Fi.
How to get automatic iPhone backups
- The device must be locked.
- The device must be powered.
- The device must be connected to a Wi-Fi network.
